Before & after: a Drab to Fab Dining Room
This dated Dining Room was in dire need of an update. Scroll down to see the process and the results!
THE BEFORE

The homeowners had built a home in the late 90s and it had not been touched ever since. We had several elements that had to stay: the floating accent wall, the dining room furniture, and the white tile floor. What follows is a glimpse inside our typical design process.
THE FLOOR PLAN

We always start by taking measurements and drawing a floor plan on CAD. Here is the floor plan that we drew which was important so that we could determine the sizes of the new furniture and the new rug.
THE MOOD BOARD
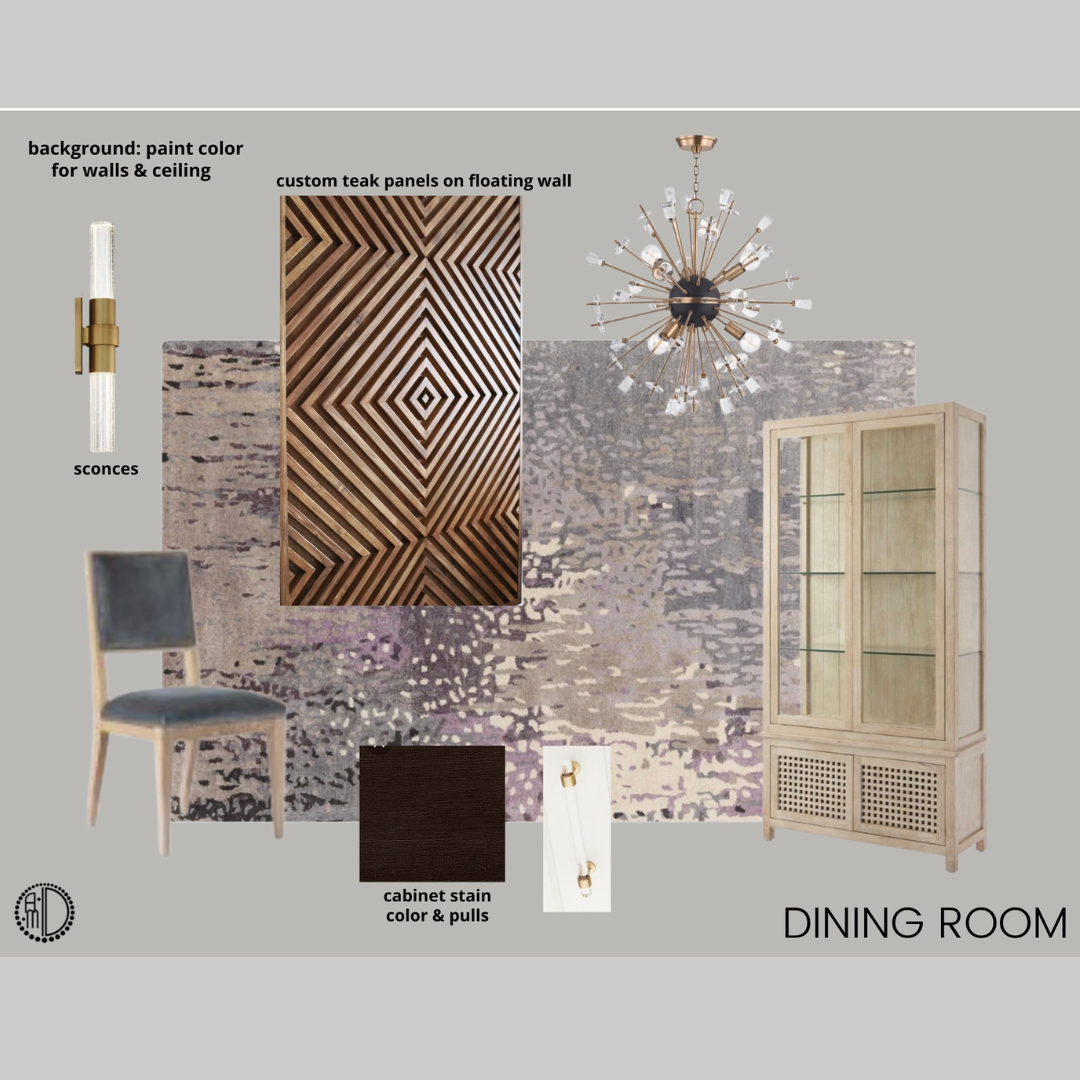
Next we get to work selecting all of the elements that will go into creating the interior design of the space. In this case we started with the rug. We chose new dining room chairs which the owner later decided to forego, instead keeping their existing chairs and recovering them. But, the most exciting element was what we decided to do with the accent wall. Adrienne got her inspo from a picture of some wood paneling. To duplicate this particular wood paneling would have been cost prohibitive, so we went and found a real wood wallpaper by Maya Romanoff to cover both sides of the accent wall. Then we had the problem of what to do with the corners. Adrienne designed solid wood end caps to be built onto the ends of the accent wall.
THE RENDERING

The next step in our process is to do a 3D photo realistic color rendering. This is to show the homeowner exactly what their room will look like and give them the opportunity to make any changes. The renderings are so helpful to everyone on the team to visualize the room.
THE AFTER

The final result: as you can see, the room turned out to be just fabulous! For info on sources, contact us!
Until next time,
